
A lot of the powerful features of having a smart home are all the tasks that can be automated but there will always be manual tasks that require your intervention such as turning off the TV or smart speakers. This can become a pain as you have to get your phone out to see the status of the house and toggle switches which often requires quite a few taps (particularly if you have authentication on your phone and on HA). One way of solving this is by sticking hardware switches in your house similar to the existing light switches but these often are expensive, for example a Phillips Hue switch costs around £20 and it only has 3 buttons. The other common option that you see Home Assistant (HA) users use is a Android Tablet as a control interface. This is much better then the switch approach as the UI can be dynamically changed, status information can be shown and the tablet can be moved around the house. It’s also better then the phone approach as the screen is always on and ready to be used so one touch can toggle a light.
The android tablet approach is not without downsides though, keeping the screen on all the time uses a lot of power, battery life is limited and android tablets are expensive. The perfect solution to this problem is to use an e-ink tablet! e-ink tablets use very little power, have a large battery life and old Kindles are plentiful on ebay and cheap (I picked up both a Kindle Paperwhite and Paperwhite 2 both for around £30 each).
AppDaemon Dashboard
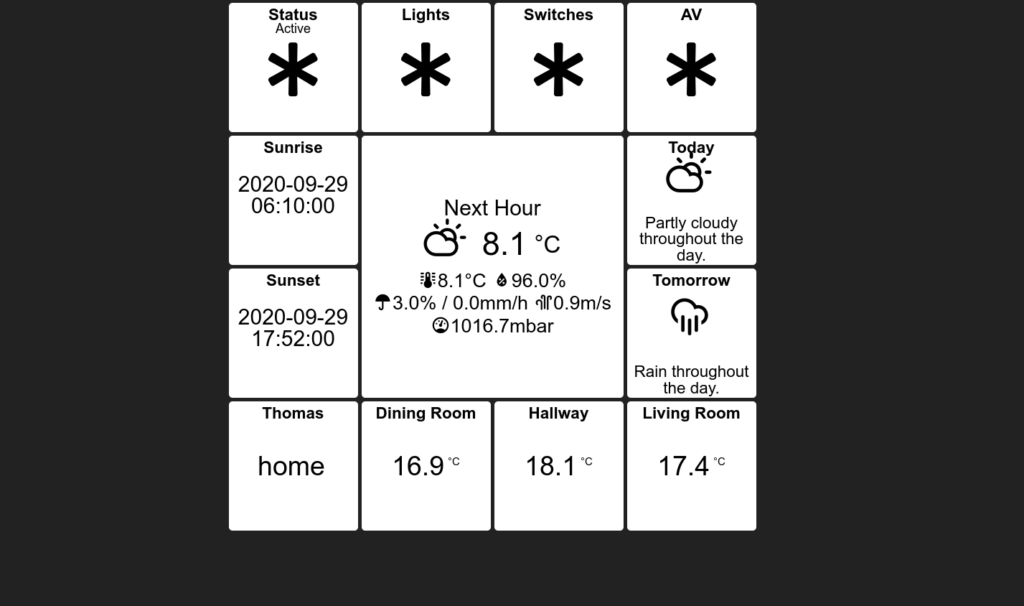
After this realisation I began experimenting with my Kindle Paperwhite. The first step was getting a suitable HA dashboard up and running as I already knew the default HA Lovelace interface was going to be too demanding for the Kindle. Enter AppDaemon which works out the box with HA and provides the ability to create simple dashboards. After setting up AppDaemon on my NAS using Docker and configuring it, I had a simple dashboard that controlled my house. Further tweaking the configuration to add a theme using CSS resulted in a greyscale screen friendly dashboard.
It was time to test the dashboard on the Kindle. Using the “experimental” browser built into Kindle’s OS I pulled up the dashboard. It didn’t work. After further research I found out that the Kindle’s browser doesn’t support websockets. Helpfully AppDaemon supports several different transports. I tried the different supported transports in AppDaemon and I even tried the undocumented sockjs transport in AppDaemon hacking into AppDaemon support for the it’s different transports but nothing worked. I’d either get a dashboard that didn’t work or a dashboard that would work briefly but then stop working (likely to be the Kindle browser optimizing power and cutting the connection). At this point I realised that the Kindle’s built in browser wasn’t going to work and I started looking for different options.
Kindle Jailbreaking
Helpfully prior to this I had Jailbroken my Kindle (I dislike locked down platforms so always aim to get root access). The information out there is somewhat confusing so I’ll try to summarise it below for PaperWhite 1 & 2. First step should be to turn off the Wifi on the Kindle if it isn’t already to avoid auto-update. Next is finding your software version number. On the main menu click the menu icon then “Settings”. Click the menu icon again then “Device Info”. You’ll find your software version under “Firmware Version”.
NOTE: The author does not take responsibility for any damage incurred by following these instructions. You alter your kindle at your own risk.
Jailbreak Kindle PaperWhite 1 (PW1)
As far as I can tell all First generation PaperWhite’s should be able to be jailbroken. The latest released firmware for PW1 is 5.6.1.1. This thread shows that this latest version can be downgraded to 5.3.3. Note this downgrade is only possible on PW1 not PW2 as far as I’m aware! Once on 5.3.3 you can use the instructions in this thread (Find the section starting “NOTE: For older devices running FW <= 5.4.4.2”) to perform a jailbreak on 5.3.3. You’ll also want to make sure you install KUAL.
The above method is what I used to jailbreak my Kindle PW1 but your mileage may vary.
Jailbreak Kindle PaperWhite 2 (PW2)
The PaperWhite 2 is slightly more tricky. Only some of them can be jailbroken via software. If you have a firmware less then or equal to 5.6.5 then you can use the instructions in this thread. You’ll also want to add the following empty folders: “update.bin.tmp” and “update.bin.tmp.partial” to the root of your Kindles disk as suggested in this thread to prevent auto-updating. You’ll also want to make sure you install KUAL.
Information on versions above 5.6.5 is mixed on the internet, this page seems to imply it is possible but I think it may be badly written as users on the mobileread forum contradict it. If you really want to jailbreak a PW2 and have the skills then you can use the hardware jailbreak described in this thread
The above method is what I used to jailbreak my Kindle PW2 but your mileage may vary.
Alpine Linux
OK after all that you should have a jailbroken Kindle PW1/PW2 and KUAL. The Kindle runs the Linux Kernel under the hood so I wondered can it run Linux and with it a full desktop browser? After a brief search I found alpine_kindle which allows installing Alphine Linux and Chrome on a PW3. Unfortunately the PW1 & PW2 don’t have as much resource as the PW3 which this targets and although I technically got it running, it was slow and crashed. I updated to code and stripped out what I could and the desktop was switched to xfce4 to save resources. Testing again resulted in it running decently but Chromium just required too much RAM and was sluggish or crashed. Chromium had to go. In it’s place I tested several lightweight browsers and found the Midori Browser to be the only suitable candidate to run on the PW1/PW2. You can find my changes and installation instructions at https://github.com/thomaspreece/alpine_kindle.
Home Asssistant Dashboard
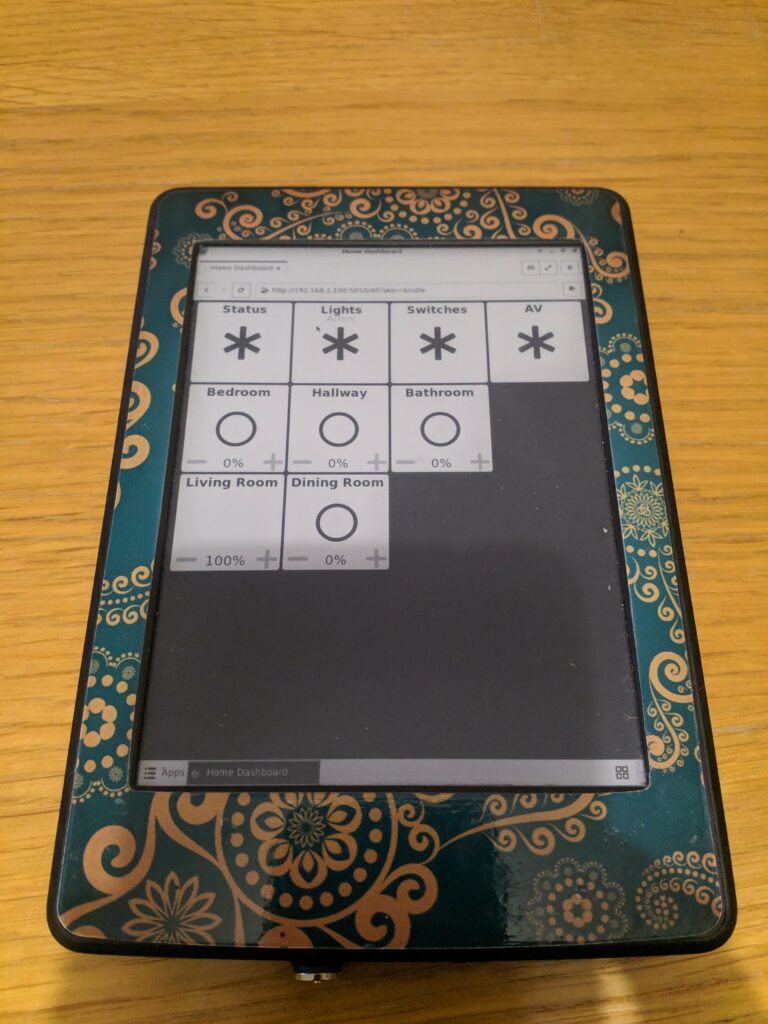
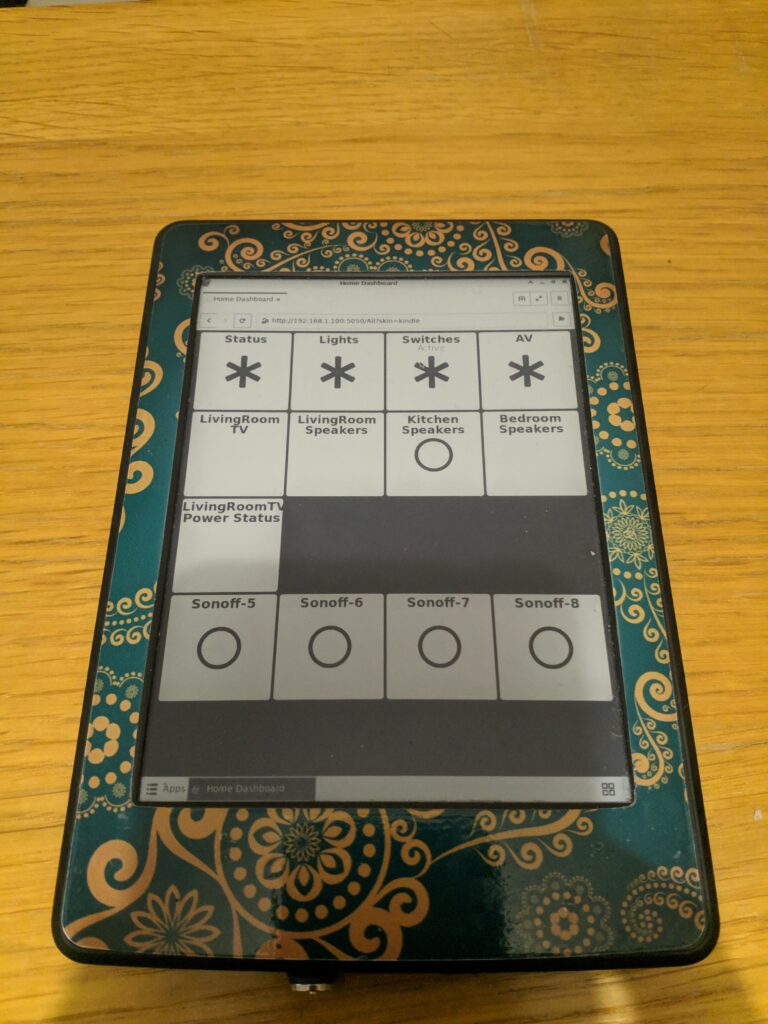
Right I had a HA dashboard and a new browser. Success. I finally had a dashboard running successfully on an e-ink device. The next step was to change the dashboard to have multiple screens for different functionality. This is where I hit another road block, for some reason using multiple pages on my dashboard for different sections would cause Midori to crash when you moved between the webpages. After some thinking I came up with the solution of using a single page dashboard with 4x screen height so when the different section buttons are clicked instead of a new webpage being loaded the page just scrolls down to that section giving the illusion of multiple dashboard pages and it resulted in faster loading then multiple pages too. The final remaining niggle was screen ghosting when changing section which was fixed with a little bit of Javascript in the dashboard to add the CSS invert property and remove again when changing section to force a full screen refresh.
The finished dashboard with all these fixes can be found at https://github.com/thomaspreece/HomeAssistant_Kindle_PaperWhite_Dashboard. This code provides the theme and dashboard so to get it to load correctly on the Kindle you’ll need to specify the theme when requesting the page on AppDeamon i.e. /All?skin=kindle.
My final hack was to edit the AppDaemon code so the AppDaemon dashboard list/homepage automatically added the kindle theme parameter to all the dashboards. If you are running via Docker you’ll have to edit the container but you want to add ?skin=kindle to the href on this line.
The next step is to design a 3D printed mount with integrated charging for the Kindles. Stay tuned.